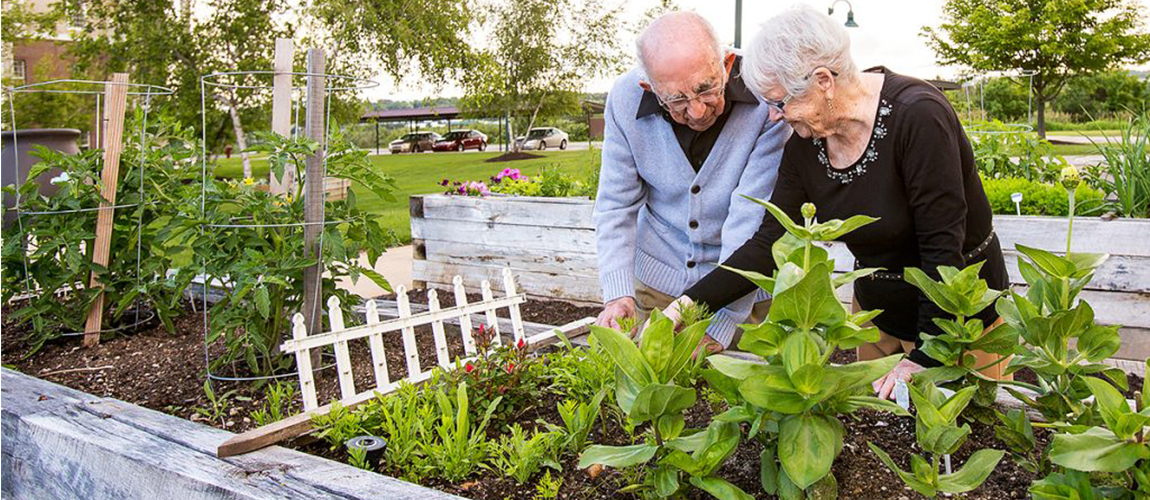
Action Life Media

action life media

  • Facebook
  • Instagram
  • Twitter
  • Home
  • About
  • Business
  • Finance
  • Home & Garden
  • Photography
  • Technology
  • Travel
  • Blog
  • Contact

April 12, 2025 by: Miles

Step-by-Step Guide to Pressurising a Worcester Boiler – Tips and Troubleshooting

Is your Worcester Bosch boiler functioning incorrectly?

So, you’re without heating or hot water?

Usually this means you have to re-pressurise the system. Not to worry, it’s a quick and easy task that you can usually handle on your own.

However, Worcester Bosch boilers need to be re-pressurised differently compared to other modern combi boilers.

So, here are the proper steps.

Maintaining the correct pressure in your Worcester boiler is vital for efficient heating and avoiding potential system failures. Low pressure can lead to inefficient heating, higher energy bills, and could even cause damage to the boiler.

This guide will help you understand pressurising a Worcester boiler, identify issues, and provide troubleshooting tips.

Understanding Boiler Pressure

Boiler pressure is the balance of water and air within the boiler’s system. Ideally, for most Worcester boilers, the pressure should range between 1 and 1.5 bars. Anything below this range indicates low pressure, which needs to be addressed.

Identifying Low Pressure

Check the Pressure Gauge

Location: The pressure gauge is typically located on the front of your Worcester boiler.

Reading: The needle should ideally be between 1 and 1.5 bars. If it falls below 1 bar, it’s time to pressurise the boiler.

Error Codes

Certain Worcester boilers display error codes when they detect low pressure. Keep an eye out for codes like “F1” or “E9”, which often indicate a need for repressurisation.

Tools and Materials Required

To pressurise your Worcester boiler, you will need:

  • A filling key or a filling loop (depending on your boiler model)
  • The user manual for reference
  • A cloth to clean up any spills

Pressurising a Worcester Boiler: Step-by-Step

Method 1: Using the Internal Filling Key

  1. Turn Off the Boiler: Ensure your boiler is switched off and has had time to cool down to prevent any accidents.
  2. Locate the Filling Key: The filling key is usually found at the bottom of the boiler. If unsure, refer to your user manual.
  3. Insert the Key: Insert the filling key into the keyhole and turn it until it clicks into the locked position.
  4. Open the Valve: Turn the pressure valve to allow water into the system. You’ll hear water flowing in.
  5. Monitor the Pressure Gauge: Watch the gauge until it reaches between 1 and 1.5 bars.
  6. Close the Valve and Remove the Key: Once the desired pressure is reached, turn the valve back and remove the filling key, storing it safely.

Method 2: Using an External Filling Loop

  1. Turn Off the Boiler: Ensure the boiler is switched off and cooled down.
  2. Locate the Filling Loop: An external filling loop is usually situated below the boiler, connecting it to the mains water supply.
  3. Open the Valves: Slowly turn the valves on the filling loop to start the water flow.
  4. Monitor the Pressure Gauge: Keep an eye on the gauge and close the valves once the pressure reaches 1-1.5 bars.
  5. Disconnect the Loop: After closing the valves, disconnect the filling loop, and ensure there are no leaks.

Troubleshooting Tips

Even with proper steps, you might encounter some issues. Here are common problems and solutions:

Pressure Not Rising

  • Check All Valves and Connections: Ensure all valves are fully open and connections are tight.
  • Blocked Filling Loop: A blocked loop can prevent water from filling. Clean or replace it if needed.
  • Water Supply Issues: Confirm that the mains water supply is functioning correctly.

Over-Pressurising

  • Bleed Radiators: Over-pressurisation can be relieved by bleeding your radiators to release excess pressure.
  • Valve Adjustment: Open the valves slowly to control the pressure incrementally.

Persistent Low Pressure

  • System Leaks: Inspect the boiler and the associated pipework for visible leaks.
  • Faulty Expansion Vessel: A malfunctioning expansion vessel can cause consistent low pressure. This task is best handled by a professional.

Maintaining Boiler Pressure

Regular maintenance can prevent pressure issues and ensure your boiler operates efficiently.

Monthly Checks

Make it a routine to check the boiler pressure monthly and adjust if necessary.

Annual Servicing

Have a qualified engineer service your boiler annually to catch any potential issues early.

User Manual Reference

Always refer to your boiler’s user manual for specific instructions and safety guidelines.

Pressurising a Worcester boiler is a manageable task with the right guidance

Follow this step-by-step guide and troubleshooting tips. Do call your local plumber and heating expert if in any doubt. You can maintain the efficiency and longevity of your boiler.

If persistent issues arise, do not hesitate to consult a professional heating engineer.

For any boiler-related assistance, Worcester Bosch and S Fearn Plumbing & Heating offer comprehensive support on their websites. Regular maintenance and timely interventions will keep your boiler in the best possible condition, ensuring a warm and comfortable home environment.


March 19, 2025 by: Miles

DIY Plumbing Fixes Every Homeowner Should Know Before Calling a Pro

Plumbing issues are a common headache for homeowners, but not every problem requires an expensive service call. Knowing how to handle minor plumbing fixes can save time, money, and stress. From leaky faucets to clogged drains, a few simple tools and basic know-how can keep your plumbing in check. However, while DIY solutions work for small problems, bigger issues may need professional attention. If a fix seems too complex or keeps coming back, consulting a plumber can prevent costly damage in the long run.

Common Plumbing Issues Homeowners Can Fix Themselves

Some of the most frequent plumbing issues homeowners encounter are dripping faucets, clogged drains, running toilets, and low water pressure. A dripping faucet is often caused by a worn-out washer or O-ring, leading to significant water waste over time. Clogged drains result from hair, grease, and soap buildup, which can slow water flow or cause complete blockages. Running toilets typically stem from a faulty flapper or fill valve, causing unnecessary water usage. Low water pressure can be traced to sediment buildup in faucet aerators or, in some cases, hidden leaks.

Other issues, such as leaky pipes, loud banging noises in the plumbing system, or discolored water, can also have straightforward fixes. Leaks may come from loose fittings, high water pressure, or corrosion, while loud pipes—often caused by sudden water pressure changes—can be quieted with a water hammer arrestor. Rust-colored or cloudy water might indicate corroded pipes, sediment buildup, or a failing water heater. If only the hot water is affected, flushing the water heater could resolve the issue. Unpleasant odors, such as a rotten egg smell from the bathroom, may be due to a dried-out P-trap or a cracked sewer vent pipe, both of which have simple solutions. Slow toilet tank refilling can indicate a partially blocked supply line rather than a valve issue, which may be resolved by removing and flushing the line.

Essential Plumbing Tools Every Homeowner Should Own

A few basic tools can make DIY plumbing fixes much easier. A cup plunger is essential for sinks, while a flange plunger is designed for toilets. Adjustable wrenches and pipe wrenches help with tightening or loosening fittings and nuts, while a basin wrench is useful for reaching tight spaces behind sinks. Plumber’s tape, also known as Teflon tape, is a quick and effective way to seal threaded pipe connections.

For tougher clogs, a drain auger (or plumber’s snake) is a step up from a plunger. A water pressure gauge can help prevent pipe damage by detecting high pressure early—simply attach it to an outdoor spigot and adjust the regulator if needed. Homeowners who want an easier way to repair broken pipes without soldering should consider a PEX crimping tool and SharkBite fittings. Smart leak detectors can also provide early warnings by sending alerts to a phone if leaks are detected in high-risk areas like under sinks or near water heaters.

How to Fix a Dripping Faucet Without a Plumber

A dripping faucet is usually caused by a worn-out washer, O-ring, or cartridge. The first step is to shut off the water supply under the sink. Next, disassemble the handle by removing the screw, which is typically located underneath or behind it. Once the faucet is open, identify the issue—washer-style faucets usually have a damaged rubber washer, while cartridge faucets require a replacement cartridge. To ensure a proper fit, take the old part to a hardware store to find an exact match. After replacing the faulty component, reassemble the faucet, turn the water back on, and check for leaks.

While the faucet is disassembled, it’s a good idea to clean out any mineral deposits inside, as buildup can affect water flow. If replacing the washer or cartridge doesn’t stop the drip, try tightening the packing nut, as some leaks originate from the handle base rather than the spout. For modern ceramic disk faucets, leaks are often due to dirty seals rather than worn-out parts, so cleaning them can resolve the issue without requiring a replacement.

Easy DIY Fixes for Clogged Sinks and Shower Drains

Clogged drains can often be cleared without resorting to chemical drain cleaners, which can damage pipes over time. One of the simplest methods is to pour a full kettle of boiling water down the drain, particularly for grease-related clogs. For ongoing maintenance, a mixture of boiling water and salt poured down the drain every two weeks can help dissolve grease and soap buildup before it becomes a problem.

Another effective approach is to use a combination of baking soda and vinegar. Pour half a cup of baking soda followed by one cup of vinegar into the drain, let it fizz for about ten minutes, then flush with hot water. If the clog persists, a cup plunger can create enough suction to dislodge the blockage, especially if the overflow hole is covered. A drain snake or zip-it tool is useful for pulling out hair and debris, and as a last resort, a wet/dry vacuum may be able to remove stubborn obstructions.

How to Stop a Running Toilet and Save Water

A running toilet can waste hundreds of gallons of water per day, but it’s usually an easy fix. The most common culprit is a faulty flapper, which should be checked to ensure it’s sealing properly. If the flapper is worn or cracked, replacing it is a simple and inexpensive solution. If the chain connecting the flapper is too long or too short, adjusting it may help achieve a full seal.

If the problem persists, check the float and adjust it to stop filling at the proper water level. If none of these steps work, replacing the fill valve may be necessary. A quick way to diagnose a leak is by adding a few drops of food coloring to the tank; if color appears in the bowl without flushing, water is seeping through a leak.

Temporary Solutions for Leaking Pipes Before Calling a Pro

If a pipe starts leaking, acting quickly can prevent water damage before a plumber arrives. The first step is to shut off the water supply, either at the nearest shutoff valve or the main supply. Drying the area will help any patching materials adhere better. A pipe clamp or epoxy putty can serve as a temporary fix for cracks, while a rubber patch secured with hose clamps can also hold for a short time. Special self-fusing silicone pipe tape can provide a temporary seal that lasts longer than duct tape.

If shutting off the water isn’t immediately possible, wrapping the pipe in a cold, wet towel can slow the leak until repairs are made. In winter, if a pipe bursts due to freezing, using a hairdryer on the affected area before turning the main valve back on can prevent further cracks.

Signs Your DIY Plumbing Fix Won’t Cut It and You Need a Plumber

While DIY solutions work for many common plumbing problems, some situations require professional help. Major issues such as burst pipes, persistent low water pressure, sewage backups, or no hot water should be addressed by a licensed plumber. Multiple slow drains may indicate a main sewer line blockage, and water stains in hidden areas, like behind cabinets, can signal a leak that needs immediate attention.

Unusual plumbing noises, such as gurgling drains when flushing the toilet, could point to a developing sewer line clog. Warm spots on the floor may indicate an underground slab leak, especially in homes with radiant heating or pipes beneath the foundation. Before hiring a plumber, it’s worth checking whether a home warranty covers the repair, as many plumbing issues fall under standard policies.

Preventative Plumbing Maintenance to Avoid Costly Repairs

Regular plumbing maintenance can help prevent expensive repairs down the road. Checking under sinks, near toilets, and around appliances for leaks on a monthly basis can catch problems early. Flushing the water heater periodically removes sediment buildup that can shorten its lifespan, while proactively cleaning drains with hot water and baking soda or vinegar helps prevent clogs. Testing the toilet for leaks, insulating pipes in cold climates, and monitoring water pressure can all contribute to a more reliable plumbing system.

Taking small, proactive steps now can save homeowners from dealing with major plumbing emergencies in the future.

January 2, 2025 by: Miles

Condo or House? How to Pick the Perfect Home for Your Lifestyle and Budget

Credit: Scott Webb Via Pexels

When it comes to finding your next home, one of the biggest questions is: Should I buy a condo or a house? Each option has its own appeal, from the low-maintenance convenience of condos to the privacy and flexibility of houses. But which one is the best fit for you?

Here’s a quick guide to help you find your dream home, one that aligns with both your lifestyle and budget.

Budget Basics: What Can You Afford?

Let’s start with the numbers. Condos and houses come with different cost structures, so it’s crucial to look beyond just the listing price.

For condos, you’ll usually have lower upfront costs but should factor in strata fees. These fees cover shared amenities and building maintenance but can sometimes be substantial, especially in luxury buildings. Houses, on the other hand, might come with higher upfront costs but don’t have those additional association fees. However, you’ll likely have higher maintenance costs down the road.

And don’t forget the hidden costs! Condos can come with unexpected assessments if the building needs big repairs. For houses, you’ll want to budget for things like lawn care, exterior upkeep, and emergency repairs. Working with a knowledgeable realtor can help clarify these costs so you’re not blindsided later on.

Space and Layout: Room to Grow or Just Enough to Thrive?

One of the biggest factors in the condo vs. house debate is space. Condos typically offer more compact living, which can be perfect if you prefer a low-maintenance lifestyle or don’t need a ton of room. With many condos, you’re close to amenities, parks, and public spaces, which can give you the perks of outdoor space without the hassle of yard work.

Houses, however, offer more flexibility in terms of space. You’ll have more rooms to spread out in, often including a yard or garden. This extra room can be ideal if you’re planning for a family, want space for pets, or dream of a backyard where you can host BBQs.

Maintenance: How Much Work Are You Willing to Do?

Condos are usually lower maintenance. With most exterior upkeep handled by the strata, you’re free to focus on your own space without worrying about mowing lawns or fixing the roof.

On the flip side, owning a house gives you full control over your property. You get the freedom to make changes but also take on the responsibility of maintenance. For some, that freedom is worth the effort.

Lifestyle Considerations: Social Scene or Solitary Retreat?

If you enjoy a sense of community, a condo might be a great fit. Condos often come with social perks, like shared amenities, community events, and easy opportunities to meet neighbors. You’ll also likely have a shorter commute if you’re in an urban area.

Houses, however, tend to offer more privacy and quiet. They’re a great choice if you want your own space away from shared walls and communal areas. For some, this privacy is essential to feeling “at home.”

Also, condos are usually located in urban (or suburban) areas, making them perfect for those who enjoy being close to the action with shops, restaurants, and entertainment nearby. Houses are often found in suburban or rural areas, where you can enjoy larger lots and a quieter neighborhood feel. The choice here really depends on whether you see yourself in the heart of a bustling city or a peaceful suburb.

Resale Value and Future Goals: Thinking Beyond Today

Looking down the road, condos can appreciate quickly in hot urban markets, but they may face resale challenges in other locations. Houses often retain strong resale value, especially in family-friendly neighborhoods with good schools. It’s worth considering your long-term goals when deciding between a condo and a house.

A great realtor can provide insights into the current market, giving you a clearer idea of how each option might appreciate over time.

In the end, the choice between a condo and a house boils down to what will make you happiest in the long run. Think about your lifestyle, your budget, and where you see yourself in the years to come.

November 6, 2024 by: Miles

Power Tools vs. Hand Tools: Which Are Better for Senior Gardeners?

For seniors who garden, choosing the right tools is key. This can make gardening fun and easy to manage even as age brings physical challenges. Senior living communities often see gardening as a favorite pastime due to its calming nature, exercise benefits, and connection with the outdoors.

Deciding between power or hand-held equipment for this hobby, though, needs careful thought. Factors like the strength levels of those involved in it, their mobility issues, if any, and the size of dedicated green spaces come into play here. All need consideration before taking that call! A steady look at advantages plus drawbacks should guide older adults best while picking out their essentials.

Benefits of Power Tools for Senior Gardeners

Electric trimmers, tillers, and the like are power tools. They bring ease of use and efficient gardening to seniors who might get worn out by manual work. Designed to lessen physical stress, these gadgets need less push than their hand-held counterparts.

For example, an electric bush shaper trims time off shaping hedges, literally! Power tool makers also offer lighter options for easier grip, which can lower injury risks from handling them. Yet they’re not without downsides. Noise is one issue, while access to electricity or battery charge is another key concern that could pose a challenge depending on individual circumstances.

Advantages of Hand Tools in Gardening for Seniors

Pruners, trowels, or hand rakes are examples of handheld tools. Seniors who love a good hands-on experience with their greens often prefer to use these. Using such tools means getting more in touch with the gardening activity itself and can serve tasks that need accuracy, like removing weeds or planting delicate blooms.

They also have an edge, they’re quiet, plus they don’t rely on electricity, making them handy even without plugs around! On the flip side, these might ask for better physical exertion, which older adults dealing with limited strength conditions, say arthritis, may find difficult.

Safety Considerations With Power Tools

Keeping safe while using power tools is crucial, especially for seniors. They often come with built-in safety features, but wearing protective gear, such as gloves and goggles, can help prevent injuries. Another thing to consider is cords, which could be a trip risk.

So going cordless with battery-operated versions might cut down on potential accidents like these! Plus, if grip strength isn’t what it used to be or hands tire easily, ergonomic design options from some power tool makers offer better hold plus less hand fatigue, increasing their overall safety profile.

Finding the Right Balance Between

A mix of power and hand tools might just be the winning strategy for senior gardeners. It’s about striking a balance between speedy gardening work while still having control over it all. Use an electric tiller to prepare the soil as step one, then bring in handheld gear when planting seedlings.

This could make workflows smooth with fewer chances of tiring out! But what works best really depends on individual tastes plus how physically able bodies are, so checking personal needs is crucial before making that final choice! Swapping tips for taking classes from other green thumbs also helps seniors find their perfect toolkit.

Conclusion

Senior gardeners have to think about what tools they need. Powerful ones make things quick, but hand tools give better accuracy and let them really feel the process of gardening. Mixing it up can keep gardening fun for seniors and easy on their bodies, too! Plus, with just the right choices in gear, senior people can get a blooming garden without hurting themselves or getting tired.

September 18, 2024 by: Miles

4 Tips for Renovating Your Bathroom

Your bathroom is one of the most important spaces in your home. Transforming it can totally change your house, by not only making it more functional, but even increasing the amount you can sell it for once you decide to sell.

Taking on a bathroom renovation requires a considerable amount of care planning to ensure you get the most out of your project. Whether you’re simply adding a few updates, or you’re doing a total overhaul, here are some of the best tips to help you successfully renovate your bathroom.

Plan Your Layout

The first step is creating a layout of how you want your bathroom to be. Before you get started on any work, you want to take the time to assess the total space you have and plan how you want to change it.

Organize your layout and to keep features like where the shower is, the toilet sink, and of course your storage space. Consider what will be realistic in your current bathroom layout and make your adjustments accordingly. Make sure that you measure the space accurately, as even a few inches difference can lead to disaster. Above all, keep plumbing in mind. Moving fixtures from one side of your bathroom to the other can significantly increase costs.

Set a Budget

As with any renovation project, you can find yourself in over your head with costs if you’re not careful. You should set a budget that includes everything from the cost of materials to labor. You always want to make sure that you add in an extra cushion for unexpected expenses.

Above all, make sure that you prioritize the most important parts of your bathroom renovation at the top of your list, from flooring and plumbing, before you move on to extra finishes like fancy faucets or mirrors.

Choose Waterproof Materials

Remember, your bathroom is one of the most humid areas of your home. So you want to make sure that every material you put inside of it is entirely waterproof. Choose high quality materials that can withstand frequent splashes and constant moisture. Although it may seem frustrating sometimes to find a balance between style and resistance, it can be done if you spend a little money on it.

Don’t Forget Lighting

Lighting is often one of the most overlooked aspects of the bathroom, and unfortunately, it can be a huge mistake. Lighting is essential when it comes to renovating your bathroom because it’s a place where you get ready from doing your hair to doing your makeup.

Not to mention, it’s much more flattering to have nice warm, and dim lighting on your face rather than fluorescent overbearing lights. You may want to consider installing an additional light around the vanity and mirror for your daily grooming.

September 10, 2024 by: Miles

Can I Put a Bathtub Outside?

Bathtubs are traditionally found indoors. They offer a calm spot to unwind and relax. But lately, more people are thinking about putting bathtubs outside! It’s an interesting idea for those who want to feel closer to nature or make their backyard extra special.

But it’s not as simple as just moving your tub outdoors. There’s a concept that needs figuring out beyond the usual bathroom setup. If considering this move, understanding what goes into it is key, from logistics and perks all the way down to potential hiccups.

Considerations for Installing an Outdoor Bathtub

When thinking about putting a bathtub outside, the first thing to think about is where it’s going. It needs privacy and practicality, so a flat spot that can handle a tub full of water is key. Also important is plumbing access for hot and cold water lines so bathing stays comfy!

Depending on where this outdoor tub goes, figuring out how to drain used bathwater might be needed too. An outdoor bathtub could look amazing, but planning ahead will make sure it works well without messing up any landscaping.

Weather and Material Durability

Outdoor bathtubs are out in the open, so picking the right material matters. Regular porcelain or acrylic tubs might not hold up outside, and neither might stone concrete or special wood. These materials can handle the weather better and keep looking good over time. Also, think about the local climate.

Very hot or cold temps could mess with both the bathtub and water supply! If harsh winters are a thing where this outdoor tub is going to be placed, then figuring out how to protect it from freezing conditions becomes important. Maybe seasonal upkeep or even a protective cover will do.

Aesthetic and Design Choices

An outdoor bathtub can really jazz up a backyard, turning it into a fancy getaway. There are tons of design options, from old-school clawfoot tubs tucked away in gardens to sleek modern ones on decks with killer views. Think about how the tub will fit in with what’s already outside.

Adding natural elements like plants or stones around the tub could make it feel more outdoorsy! Maybe even add extras like privacy screens, lights for night-time baths, or cozy fire pits. The trick is mixing practicality and good looks so that this new addition fits right into your existing outdoor space.

Practicality and Maintenance

An outdoor bathtub sounds awesome, but don’t forget about the practical and upkeep. Outdoor tubs need regular cleaning because they’re exposed to dirt, leaves, you name it. Unlike indoor bathtubs that are shielded from outside elements, an outdoor one might need more scrubbing and care.

Safety features like non-slip surfaces matter, too, especially if there’s a pool nearby or any place where things could get wet and slippery! Also important is making sure small parts (like the bathtub stopper) work well so no leaks happen or water gets wasted. Keeping these points in mind makes using your new addition enjoyable instead of just another thing on your chore list.

Conclusion

Putting a bathtub outside can make bath time unique and fancy, letting anyone soak in style while enjoying nature. But it’s not something to rush into. Planning ahead, picking the right materials, and keeping up with maintenance are key to getting the most out of an outdoor tub.

Whether aiming for a peaceful hideaway or an eye-catching backyard feature, an outdoor bathtub could be just what’s needed! Just remember, there will be challenges along the way that need tackling.

August 29, 2024 by: Miles

3 Tips For Keeping Your Belongings Safe During A Move

When you’re moving to a new home, one of the biggest stressors is getting all of your belongings from one place to another place while keeping everything safe and secure. Luckily, there are things that you can do all along the way to help with this and ensure that all of your most important items make it with you to your new place.

To help you learn how this can be done, here are three tips for keeping your belongings safe during a move.

Keep Your Most Valuable Items With You

Whether you’re choosing to work with a moving company or you’re going to take on all aspects of your move yourself, you’re going to want to be careful with how you pack and store your most valuable items when you’re moving.

To ensure that everything that you value most is going to be safe and secure, it’s usually best to keep these items with you. Especially for things like valuable jewelry or important information, you should get yourself a lock box that you can store these items in and keep them in your personal vehicle rather than putting them in with everything else as you pack and move. This way, you can always have eyes on these items and ensure that you know exactly where they are and who’s having access to them.

Invest In Quality Packing Materials

To keep your belongings safe while you’re trying to pack and move them to your new home, you’re going to want to use quality packing materials.

While you can use old boxes to store your items, new boxes that are solid and haven’t been thrown around yet will be best for storing items that you want to keep safe. And within these boxes, you’ll want to use paper or air cushions so that there isn’t any empty space in the box and everything in there won’t jostle around too much.

Lock Your Stuff Up

For most people, moving is something that’s going to take place over a few days or even weeks. This will mean that some of your stuff will be packed for quite a while and could be all kept in the same place.

To ensure that all of your belongings are safe, especially if they’re going to be kept in a storage area or a moving truck for an extended period of time, you should invest in quality locks. This way, you’ll be able to keep people out of your stuff while it’s sitting and can rest a little easier knowing that there is some physical protection in place for your belongings.

If you are going to be moving soon, consider using the tips mentioned above to help you learn how to best keep your stuff safe during this process.


August 29, 2024 by: Miles

Transform Your Space With These Easy Home Upgrades

Revamping your home need not be a daunting, wallet-draining venture. Simple enhancements can breathe new life into your space, creating a sanctuary that reflects your taste and meets your needs for comfort and functionality. From inviting ambiance to cutting-edge tech, a few strategic updates can have a transformative impact. Below, explore easily implementable home upgrade ideas that will reinvent your living quarters without breaking the bank.

Enhance Ambient Lighting To Elevate Your Living Space

The right lighting is crucial for setting the mood in any room. Ambient lighting functions as the base layer, providing a soft glow that can make spaces feel warm and inviting. Upgrading overhead lights to dimmable LED options or installing smart bulbs allows you to adjust lighting levels to match any occasion.

Don’t overlook the importance of natural light. Consider the use of exterior solar shades for windows to control glare and heat from the sun while still letting in diffused light. These shades allow for energy efficiency and protect your furniture from harmful UV rays without sacrificing illumination.

For a personalized touch, incorporate accent lighting with decorative lamps or string lights. These can highlight architectural features or artwork, and provide functional lighting for activities like reading.

Incorporate Indoor Plants for a Breath of Fresh Air

Plants are more than mere decorations; they are living elements that can enhance mental well-being and improve indoor air quality. Adding a variety of indoor plants can create a calming natural oasis within your home. For those less green-thumbed, choosing low-maintenance species ensures you enjoy the benefits without extensive care.

For an effortless green touch, consider incorporating faux trees indoors. They provide the beauty of greenery without the upkeep associated with real plants, an ideal choice for busy individuals or those prone to travel. They similarly contribute to a sophisticated natural aesthetic, instantly elevating your interior.

Varying the sizes and types of plants can also add texture and depth to your space. Think hanging pots for cascading plants and large floor plants that can act as statement pieces. When positioned thoughtfully, these living elements can serve as natural room dividers, creating intimate spaces within larger rooms.

Upgrading to Smart Home Devices for Efficiency and Convenience

Smart home devices have revolutionized the way we interact with our living spaces. Devices such as smart thermostats and lighting systems not only provide convenience but also contribute to energy efficiency and reduced utility costs. With simple voice commands or a few taps on a smartphone app, control over your home’s environment is at your fingertips.

Security is another aspect that has seen significant advancements with smart technology. Video doorbells and smart locks offer peace of mind with real-time alerts and remote monitoring capabilities, ensuring your home is safe whether you’re present or away.

The integration of smart appliances can also streamline household tasks. Smart ovens, refrigerators, and washing machines come with features that save time and energy, enabling you to focus more on activities you enjoy.

Refresh Your Room With a New Color Scheme and Textile Throws

A fresh coat of paint can do wonders for any room, serving as one of the most transformative and cost-efficient upgrades available. Current color trends lean towards serene blues, soft neutrals, or bold jewel tones, depending on the mood you wish to create. Complement the new palette with matching or contrasting textile throws, and you have a revitalized space that reflects current design trends.

Accent walls continue to be a popular choice for adding a pop of color without the commitment of painting an entire room. Wallpaper has also made a comeback, offering patterns and textures that inject personality and visual interest.

When it comes to textiles, they aren’t just for comfort; they serve as an element of design. Layering different fabrics and textures can add a sense of coziness and luxury to a space. Consider soft blankets, plush cushions, and tactile rugs that invite touch and contribute to a well-curated room.

Overall, transforming your home into a place of comfort and style doesn’t require grandiose changes. By starting with these simple upgrades, you create a haven tailored to your personal preference and practical needs. Whether it’s smart storage or a splash of color, these effortless modifications can lead to a more fulfilling and efficient home life.

July 26, 2024 by: Miles

The Reasons we Love the Garden Shed.

When it comes to iconic images of the home and garden, the classic garden shed is often at the forefront of our imagination. A well-positioned garden shed can add to the attraction of your property.

Our love affair with gardens is undeniable and for a good reason. A well-maintained garden can be a source of pride, relaxation, and a space for entertainment. A garden can be a place to entertain with barbeques and family gatherings.

A garden shed is more than just a storage space, it can be used for a multitude of reasons besides storing gardening equipment and protecting plants in the winter months.

Investing in a quality garden sheds can transform your outdoor space and enhance your enjoyment of your house and home.

Below are some reasons why sheds are an important part of our homes and gardens.

Year-Round Gardening

Due to the huge size of the country, Australia has several different climate zones and growing conditions. The northern section of Australia has a more tropical climate, hot and humid in the summer, while warm and dry in the winter. The southern parts are cooler with mild summers and cool, sometimes rainy winters. The majority of the country requires year-round gardening. Garden sheds provide shelter for your gardening tools and equipment, ensuring they remain dry and protected from the elements all year around.

Storage

From bikes and lawnmowers to gardening equipment and tools, clutter can quickly accumulate if being kept in the house. A garden shed is a practical solution with dedicated space to store items used to keep making your exterior garden and home looking beautiful.

Hobby Cave

Beyond being just a storage space, a garden shed can double up as a place to exercise your hobbies and interests. Whether you’re into woodwork, painting, or crafting, a shed can be converted into a practical workspace. Some people choose to use their garden shed as a workspace or office in the warmer months. With electrical outlets and a WIFI connection some businesses are run from the entrepreneurs’ garden sheds.

Increased Property Value

Investing in a high-quality garden shed isn’t just a practical solution to storage space. It will increase the value of your property providing extra storage space for potential future buyers. A well-designed and maintained garden shed will enhance the curb appeal of your property and will see the overall value increase.

Protection for Fragile Plants

While the climate is unpredictable, many plants thrive in mild, moist conditions. A garden shed can be the ideal place to help tropical plants survive the colder months and protect against frost. It provides a controlled environment, protecting your flora from harsh weather, ensuring they flourish year after year.

So, the garden shed is not only a long-established part of our homes and gardens it is a practical solution to maintain a beautiful garden and store away the equipment, tools, and items that we require to keep our gardens looking great.


July 25, 2024 by: Miles

3 Things To Consider When Repainting Your Home

If you’ve noticed that your home isn’t looking quite as well maintained on the outside as you’d like it to, you may want to consider putting a new facade on the exterior of your home and sprucing up the architecture with some paint. But while this might sound like a great idea that you can totally take on in your head, the actual execution of a project like this often isn’t as easy as you’d like to think.

To help you get everything right here from start to finish, here are three things to consider when repainting your home.

Start With The Right Materials

Before you take on a big project like this, you’ll want to make sure that you have all of the right materials at the ready so that you can take out as much of the work as you can in a single day.

For repainting your house, you’ll need to acquire materials like paint, primer, caulking, a sander, and more. And to get the most ideal finished product, you won’t want to cut corners on the quality of the materials that you purchase. Make sure that you’re opting for something with great reviews and is made by a reputable manufacturer to know that the work that you’re putting into repairing your home will last for years to come and will look great as well.

Paint Strategically

Once you have everything you need to start repairing your home and you’ve done all of the preliminary work of prepping your house, you’re going to want to go into the process of painting with a very strategic plan.

The best way to start is to apply a primer. Then, you’ll want to start adding your color from the top of the home to the bottom. This will help you control any streaking and make sure that you have an even finish over the entirety of the home. And as you’re painting, make sure you always keep a wet edge so that you can blend everything together. The best way to do this is by working in small areas until you’ve got it exactly how you want it.

Clean And Touch Up As You Go

Finally, as you’re making your way around your home and applying the paint, your life is going to be so much easier if you clean and touch up any mistakes that you’ve made as you go along. Paint is so much easier to work with when it’s still wet. So if you notice that something is looking streaking or that you’ve gotten paint somewhere that you hadn’t intended, take the time in the moment to fix this mistake before you move on.

If your home could use a fresh coat of paint, consider using the tips mentioned above as you prepare to repaint the exterior of your house.

  • 1
  • 2
  • 3
  • …
  • 59
  • Next Page »

About Us

I’m Miles, the editor and creator of this blog. I am a big nerd for anything tech related and I have also developed a big passion for photography and film. I discovered this passion after taking a course in school and ever since I have fallen in love with capturing everything from sports, to travel, to cars, and much more Read More…

Connect With us

  • Facebook
  • Instagram
  • Twitter

Newsletter

Facebook

Action Life Blog

About Us

I’m Miles, the editor and creator of this blog. I am a big nerd for anything tech related and I have also developed a big passion for photography and film. I discovered this passion after taking a course in school and ever since I have fallen in love with capturing everything from sports, to travel, to cars, and much more Read More…

Newsletter

Facebook

Action Life Blog

© 2025 · Fun Genesis WordPress Theme by, Pretty Darn Cute Design